How Can We Help?
This guide explains how to configure SendBlaster (v4) to send emails using Mail250 SMTP securely.
Before you start
Keep these details ready from your Mail250 account:
-
SMTP Host
-
SMTP Port
-
SMTP Username (full format)
-
SMTP Password
-
Allowed sender email (From address)
Recommended (working) values used in this guide:
-
SMTP host:
smtp.swipemail.in -
Port:
587 -
Security: STARTTLS (automatic in SendBlaster when SSL is unchecked)
-
Username example:
SMTP_USERNAME@swipemail.in
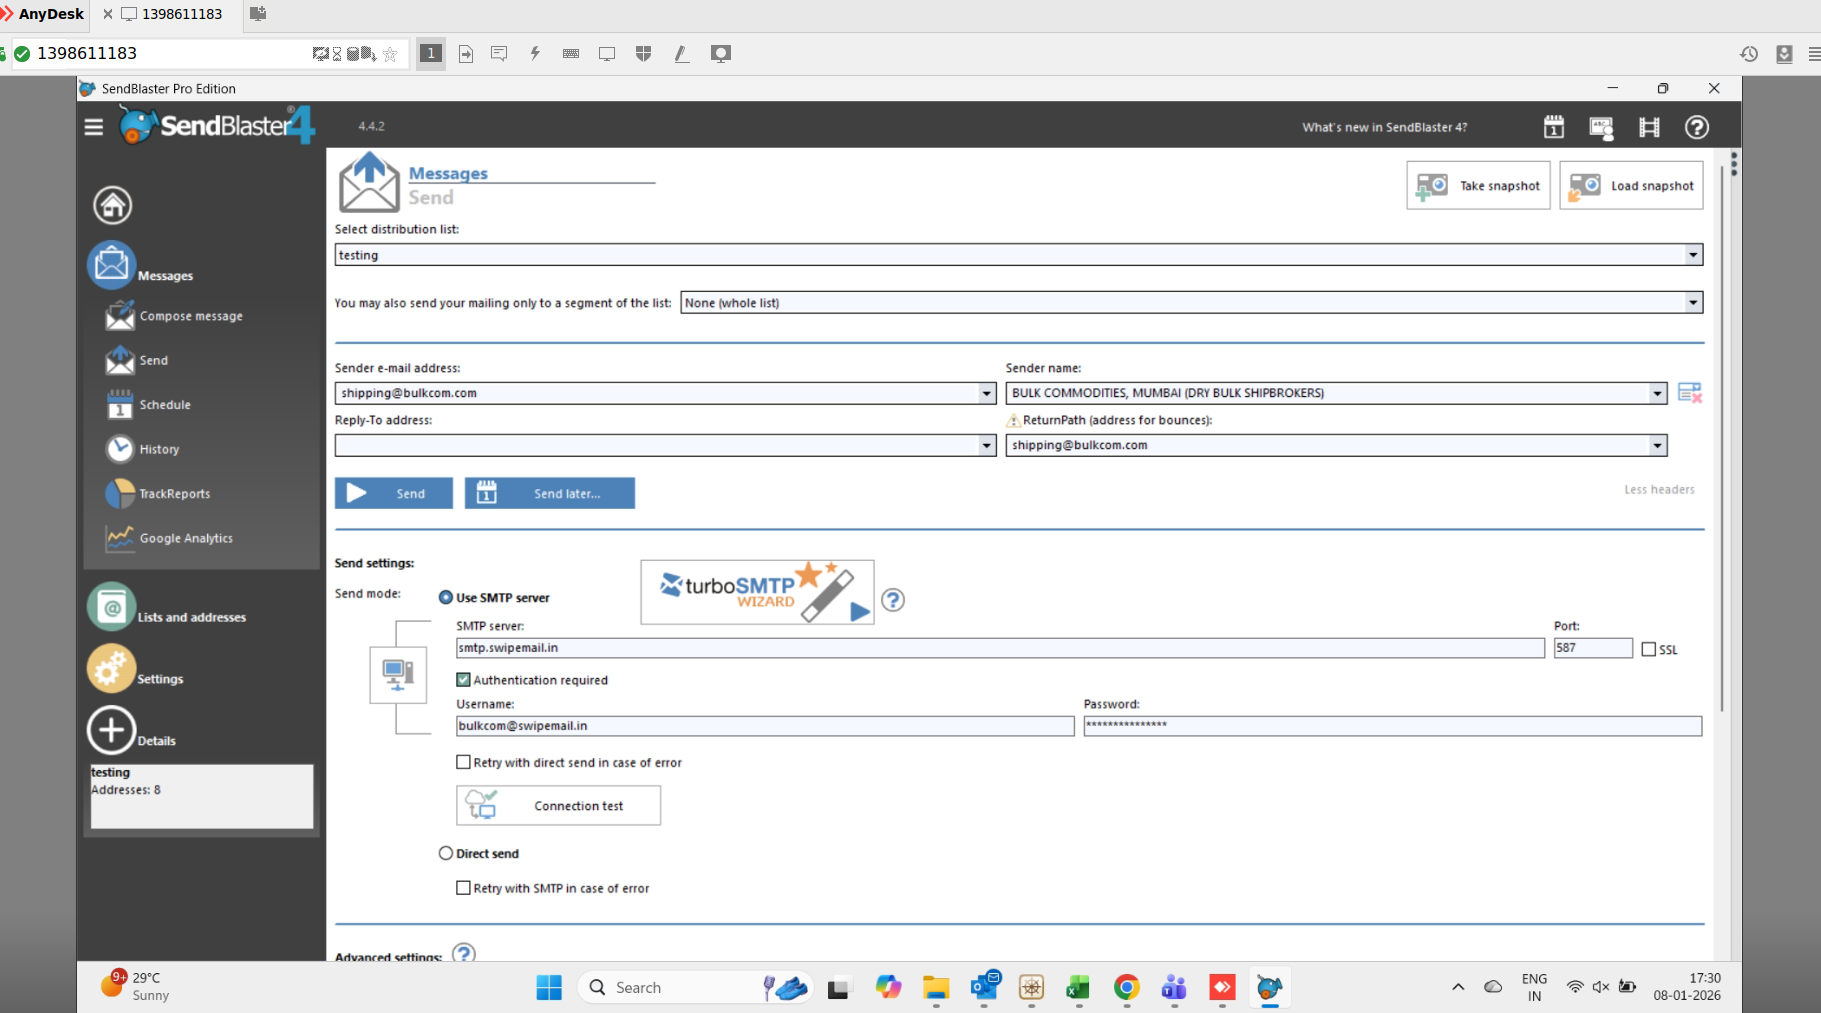
Step 1: Open SendBlaster SMTP settings
-
Open SendBlaster
-
Click Send (left menu)
-
In Send settings, select Use SMTP server
Step 2: Enter SMTP server details
In the SMTP section, fill these fields:
-
SMTP server:
smtp.swipemail.in -
Port:
587 -
SSL: Unchecked
-
Check: Authentication required
-
Username: your full SMTP username (example:
SMTP_USERNAME@swipemail.in) -
Password: your SMTP password
Important:
-
Do not use short usernames like
SMTP_USERNAME -
Use the exact username provided by Mail250
Step 3: Verify connection (Connection test)
-
Click Connection test
-
If you see “Connection established”, SMTP login is working.
If it fails, jump to the Troubleshooting section.
Step 4: Set sender details (From / Return-Path)
At the top of the Send screen:
-
Sender e-mail address: use your sender address (example:
shipping@mail250.com) -
Sender name: your brand or company name
-
ReturnPath (address for bounces): usually the same as sender email
Tip:
If sending fails later due to sender restrictions, test once using the same email as your SMTP username, then switch back.
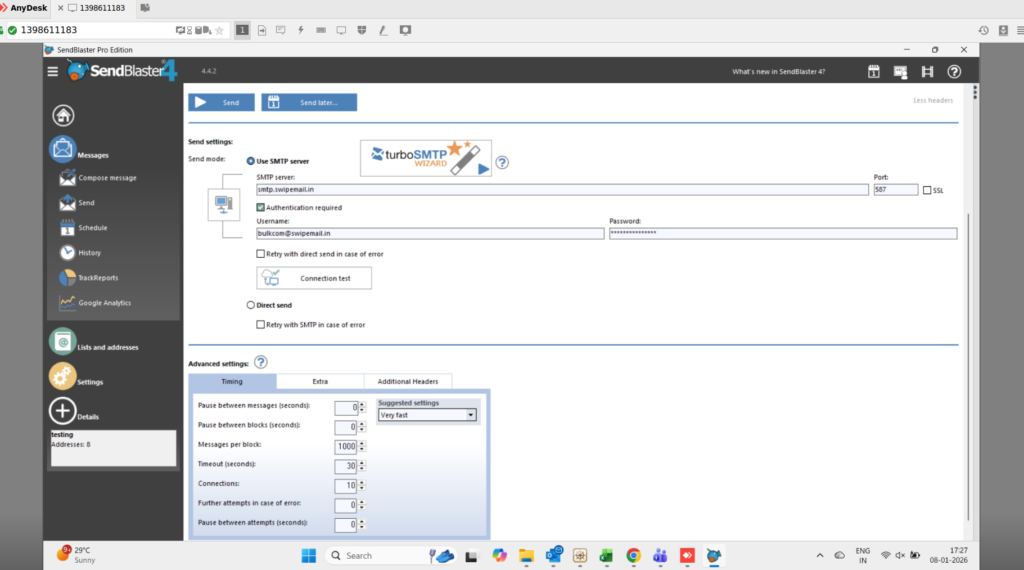
Step 5: Recommended speed settings (avoid blocks)
SendBlaster can send too fast and trigger throttling. For stable sending, set safe values.
Go to Advanced settings → Timing and use:
-
Suggested settings:
Normal -
Connections:
1 -
Messages per block:
50(or100) -
Pause between messages:
1 to 2 seconds -
Pause between blocks:
10 seconds -
Timeout:
60 seconds
After successful campaigns, you can increase gradually.
Step 6: Send a test email
-
Create a small test list (1 to 3 recipients)
-
Send a simple email with a basic subject like “Test”
-
Confirm delivery in the inbox
Troubleshooting
Error: 530 5.5.1 Authentication Required
Meaning: SendBlaster is trying to send before logging in.
Fix:
-
Ensure Authentication required is checked
-
Ensure Username and Password are filled
-
Use Port
587and keep SSL unchecked
Error: 334 (during authentication)
Meaning: The server is asking for username or password during AUTH LOGIN. This is normal, but if it fails after 334, credentials are wrong.
Fix:
-
Use the full SMTP username (example:
SMTP_USERNAME@swipemail.in) -
Re-enter the password carefully (avoid extra spaces)
-
Use Port
587and SSL unchecked
Error: 535 Authentication failed
Meaning: Username or password is incorrect.
Fix:
-
Confirm the exact SMTP username from Mail250
-
Reset SMTP password in Mail250 and update in SendBlaster
-
Try Connection test again
Error: 550 or 553 Sender rejected / not allowed
Meaning: Your From address is not permitted by the SMTP server.
Fix:
-
Test sending once with From email same as SMTP username
-
Ask Mail250 support to allow or verify your domain and sender (example:
bulkcom.com)
Best practice for new accounts (warm-up)
If this is a new domain or new SMTP account, scale slowly:
-
Day 1: 50 to 100 emails
-
Day 2: 200 to 300 emails
-
Day 3: 500 to 800 emails
-
Then increase gradually